For a very simple taxonomy, and especially where the data is available in a comma-separated values (CSV) file, a new taxonomy can be added with no coding.
For the example below we’ll be using a taxonomy called The Thackery T. Lambshead Pocket Guide to Eccentric & Discredited Diseases, or “lamb” for short.
We’ll define the taxonomy in a file called lamb.csv. The file must contain two columns, and they must be specifically named “DIAGNOSIS CODE” and “LONG DESCRIPTION”. So the first few lines of lamb.csv might look like this:
"DIAGNOSIS CODE","LONG DESCRIPTION"
"lamb001", "Ballistic Organ Syndrome"
"lamb002", "Emordny's Syndrome"
"lamb003", "Hsing's Spontaneous Self-Flaying Sarcoma"
"lamb004", "Third Eye Infection"
Put this file into the conf directory under Tomcat’s main directory: $CATALINA_HOME/conf on Unix-based systems, or %CATALINA_HOME%\conf on Windows.
Under Tomcat’s webapps directory, find taxonomies, and within that the WEB_INF/classes directory ($CATALINA_HOME/webapps/taxonomies/WEB_INF/classes or %CATALINA_HOME%\webapps\taxonomies\WEB_INF\classes). In that directory there will be a file called TaxonomyServicesConfiguration.xml. Copy that file to the conf directory described above.
Open the newly copied file in a text editor (or an XML editor). Copy the existing <taxonomy_service> block for the ICD 9 taxonomy – everything from <taxonomy_service> to </taxonomy_service>, inclusive – and paste it in before the </taxonomy_services> (note the plural) line.
Then change the newly-pasted block to have appropriate values for your new taxonomy – specifically the name of the CSV file you created above. Here’s our example:
...
	<taxonomy_service>
		<identifier>
			lamb
		</identifier>
		<name>
			Thackeray T Lambshead Taxonomy Service
		</name>
		<description>
			Thackeray T Lambshead was a classifier of eccentric and discredited diseases.
		</description>
		<version>
			1.0
		</version>
		<ontology_service_class_name>
			org.sahsu.taxonomyservices.GenericCsvBasedTaxonomyService
		</ontology_service_class_name>
		<parameters>
			<parameter>
				<name>
					lamb_file
				</name>
				<value>
					lamb.csv
				</value>
			</parameter>
		</parameters>
	</taxonomy_service>
</taxonomy_services>
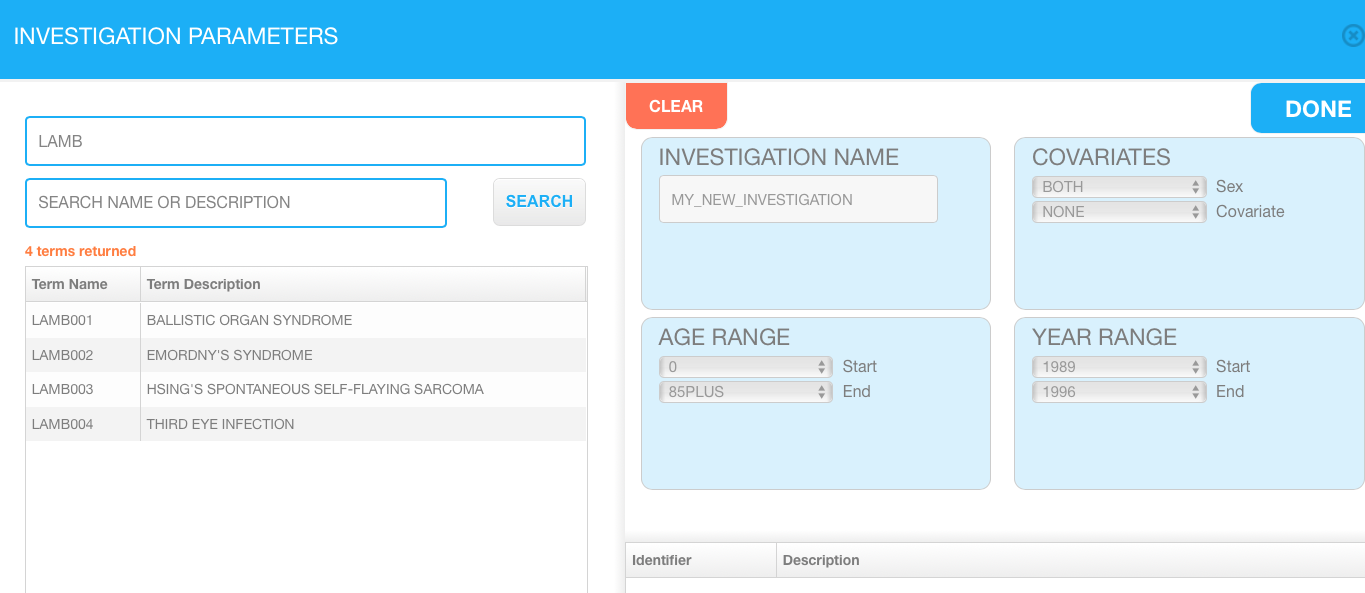
Save the files, stop and restart Tomcat, and your new taxonomy should appear in the dropdown list with the others. Here’s a screenshot of our fictional one in action:

If your taxonomy requires a more complex data source than a CSV file, or in some other way is more complex, then some coding will be needed. A detailed explanation of what might be needed is outwith the scope of this document, but the configuration would be via the same XML file described above.
The major difference would be that that a new Java class would have to be written, and specified in the <ontology_service_class_name> element of the XML configuration file. To get an example of the kind of approach you can look at the classes ClaMLTaxonomyService.java and GenericCsvBasedTaxonomyService.java in the RIF codebase.